Watermark Template Creation/Update with Watermark
Details

| Name | Description |
|---|---|
| Author | Max Keller |
| Reviewer | Ellis Douglas |
| Name | Template Creation/Update Watermark |
| Version | 1.0 |
| Categories | [doc][wex] |
Overview
This article explains how to create and update templates using Watermark 3.0.
Procedure
1. Download a copy of the template you wish to modify.
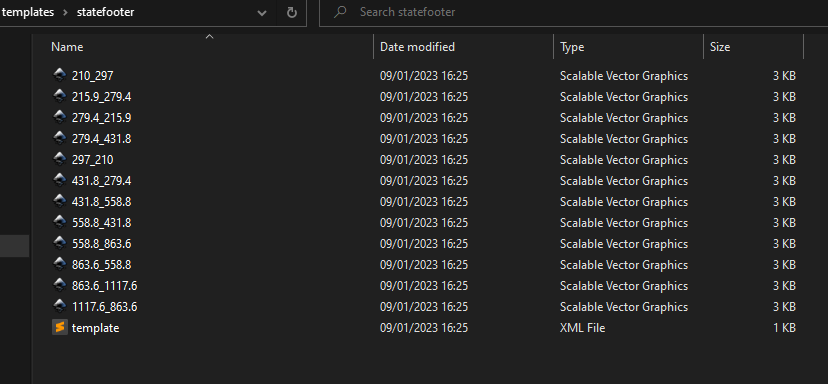
Unzip the downloaded .zip so you can work on the .svg file that it contains. (In this case, we have different .svg file for every paper size, A4 => 215.9_279.4.svg, although normally is 210_297.svg)
2. Consider using inkscape to view and modify the .svg files
(If you don’t have Inkscape yet, skip this and got to next step 2.1) The picture below shows the content of the 215.9_279.4.svg file that we just downloaded using Inkscape.
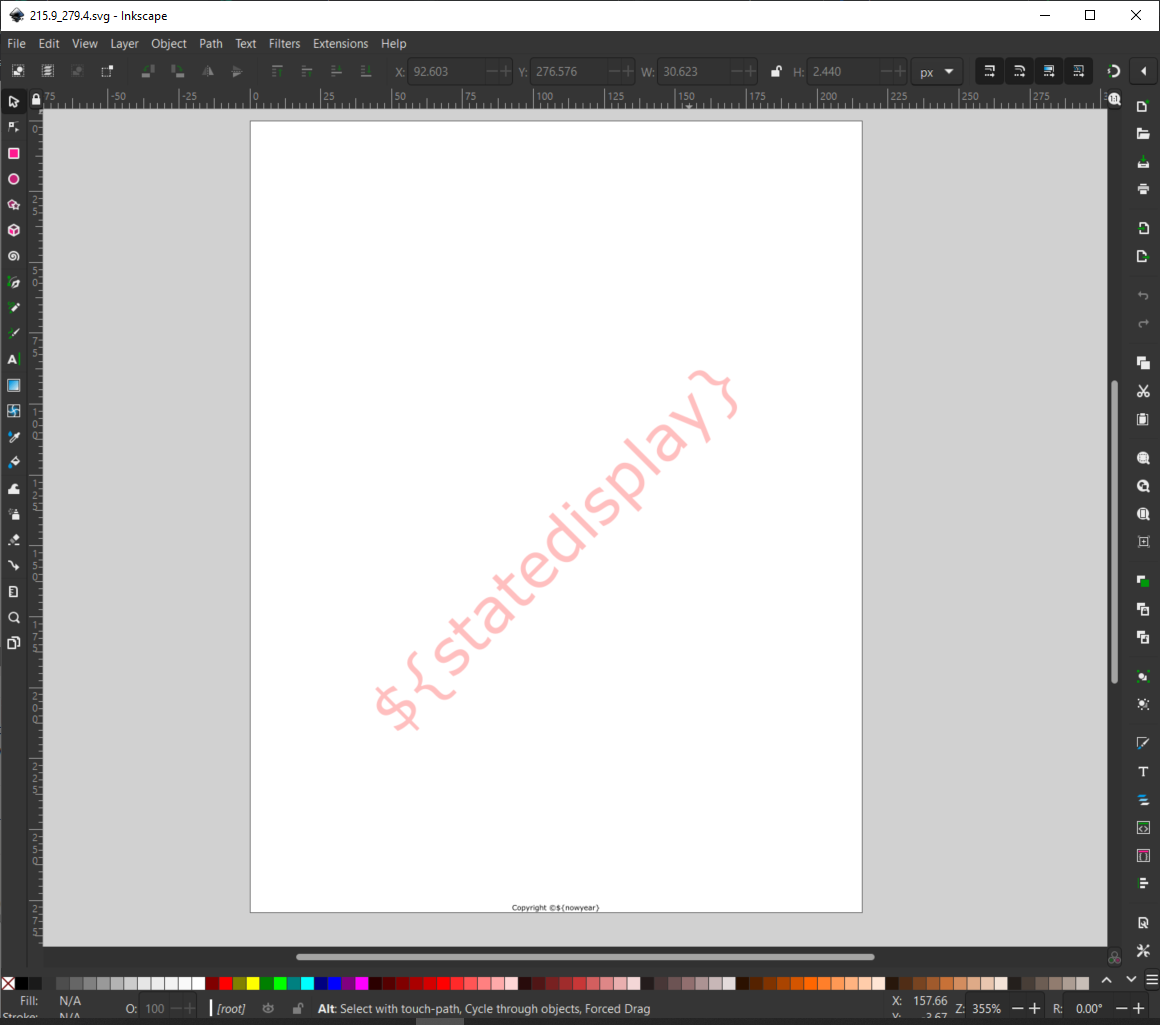
Modify the content of the template to match your needs. For this demonstration, I will get rid off the left and right corner keys and replace the remaining ones with what I need. Make sure you save the modified file.
2.1. (In case you don’t have Inkscape yet) Use any text editor.
I will use Sublime for this demo. It should look something like this:
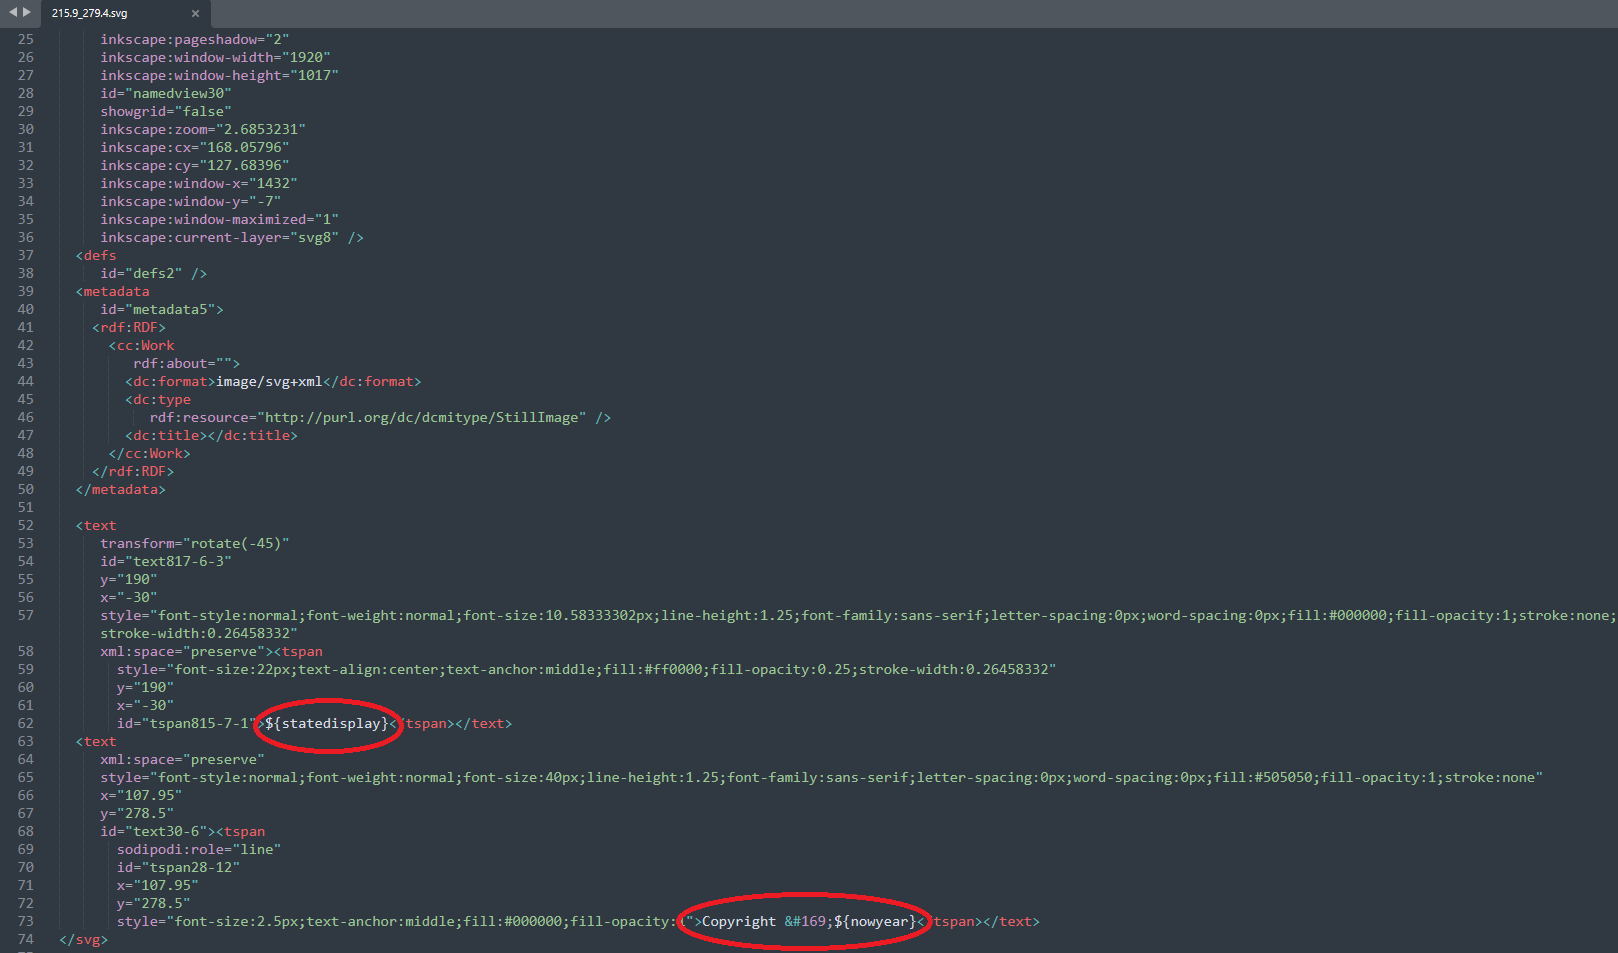
As you can see, every key that you could see in step 2 via Inkscape is also accessible if you open the .svg file with a text editor. Now we will do the same as in step 2, removing and replacing keys as needed. (If you want to remove a key, you can remove the <text> tag that hold that key.) This is how the .svg file will look like if we want to achieve the same result as what we did on step 2 using Inkscape.
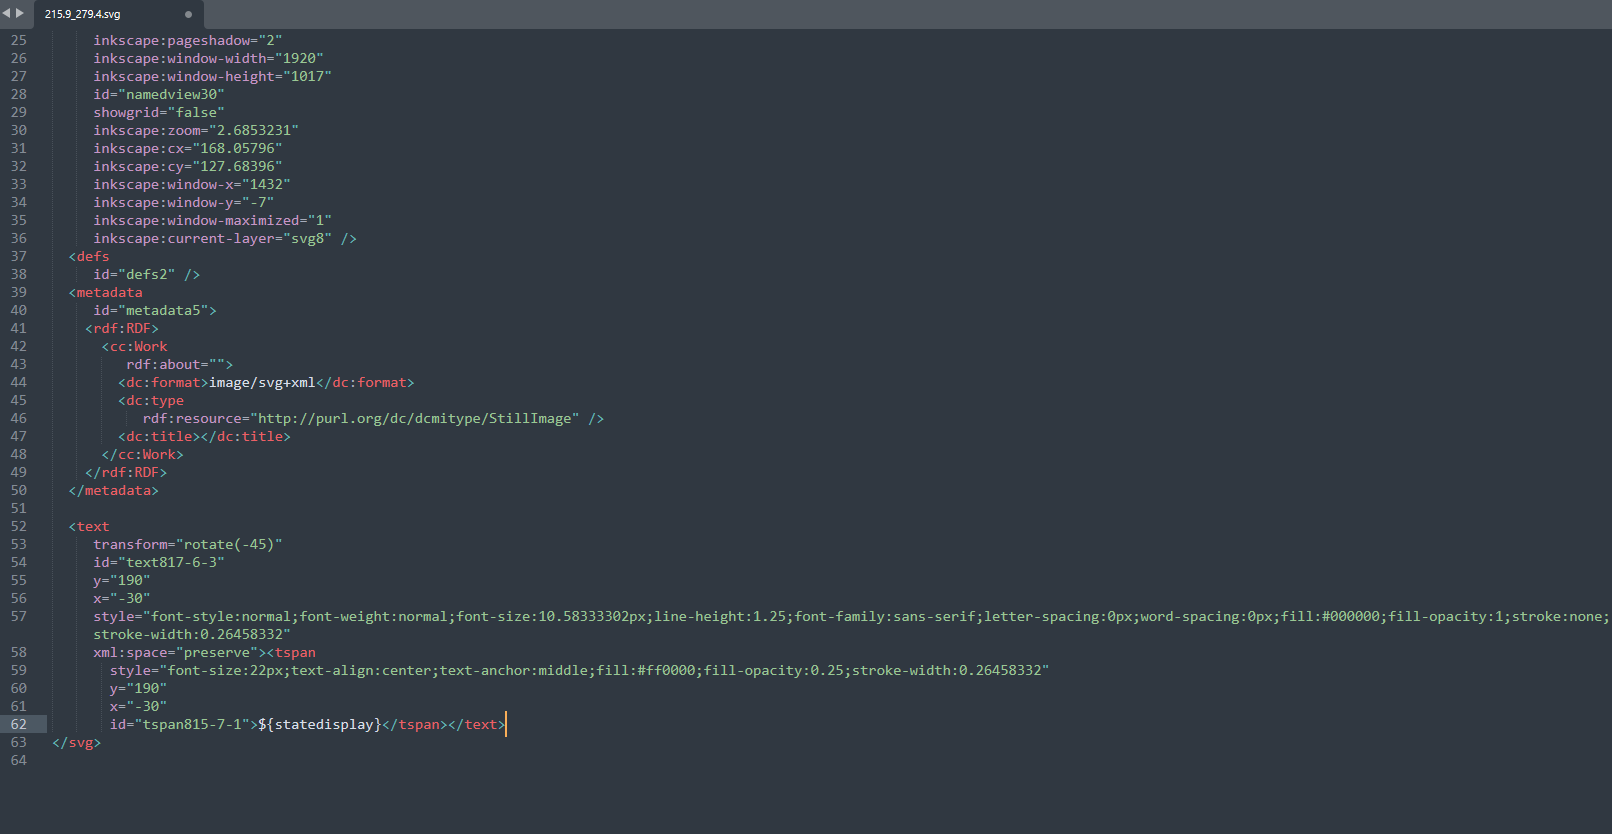
As you can see, I removed the <text> tags I didn’t want to use, I could also replace keys with ones I wanted to use or add them and pass them to the watermark engine. Make sure you save the modified file.
*Repeat this process for all the papersizes that you need by modifying the corresponding .svg file.
3. The next step is to import the modified svg files to Windchill.
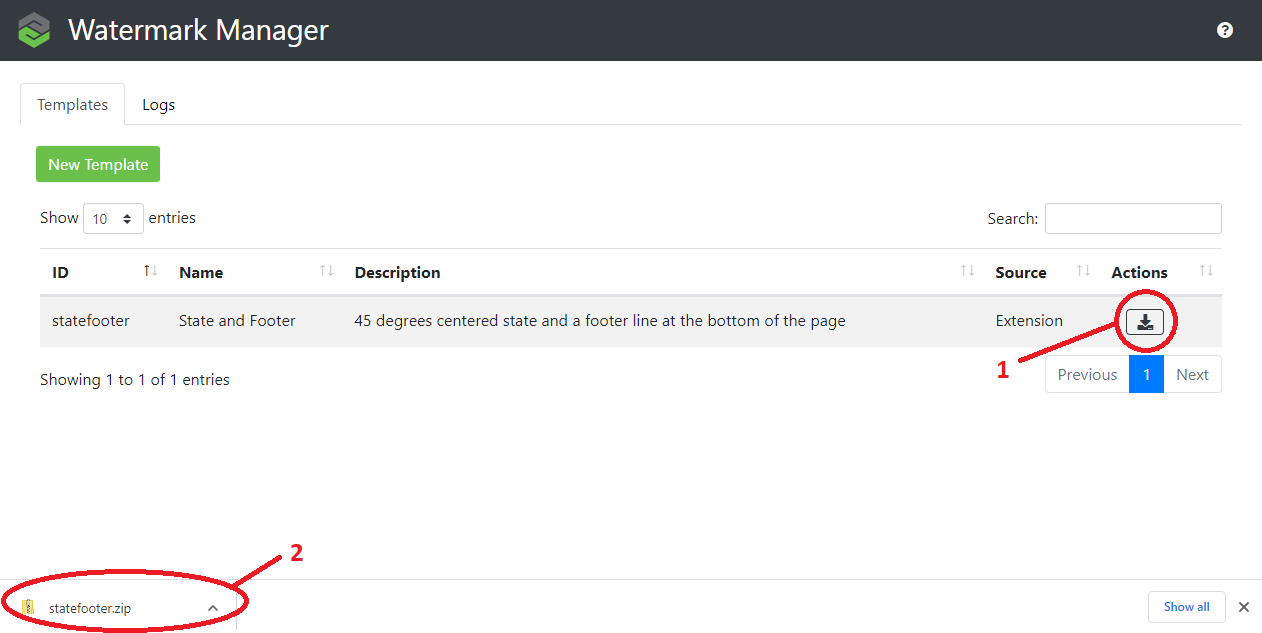
First create a new Template via the Watermark Manager UI as shown below: (1) Click on “New Template” button (2) Fill the new template information.
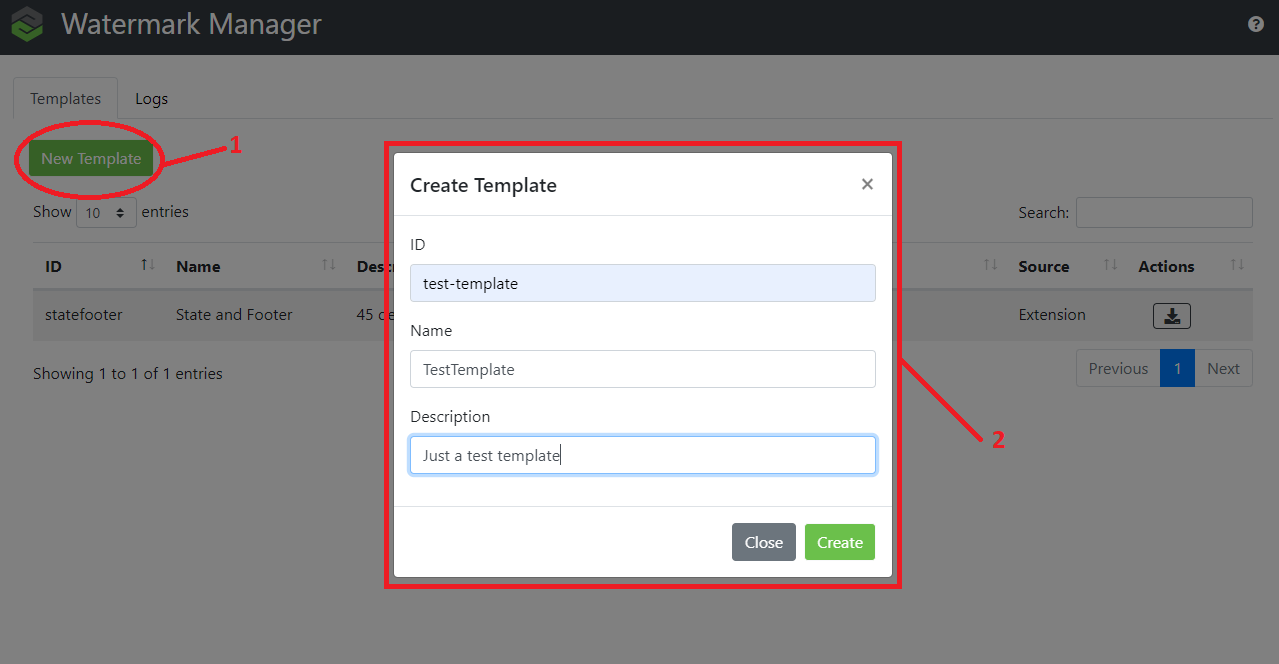
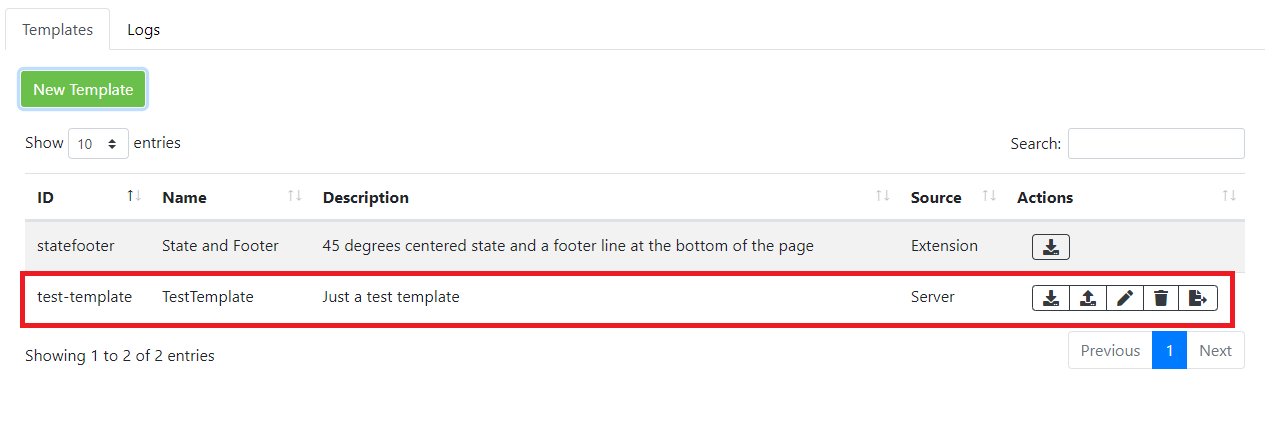
Finally hit the “Create” button. At this point, the Watermark Manager will show the template you just created in the table.
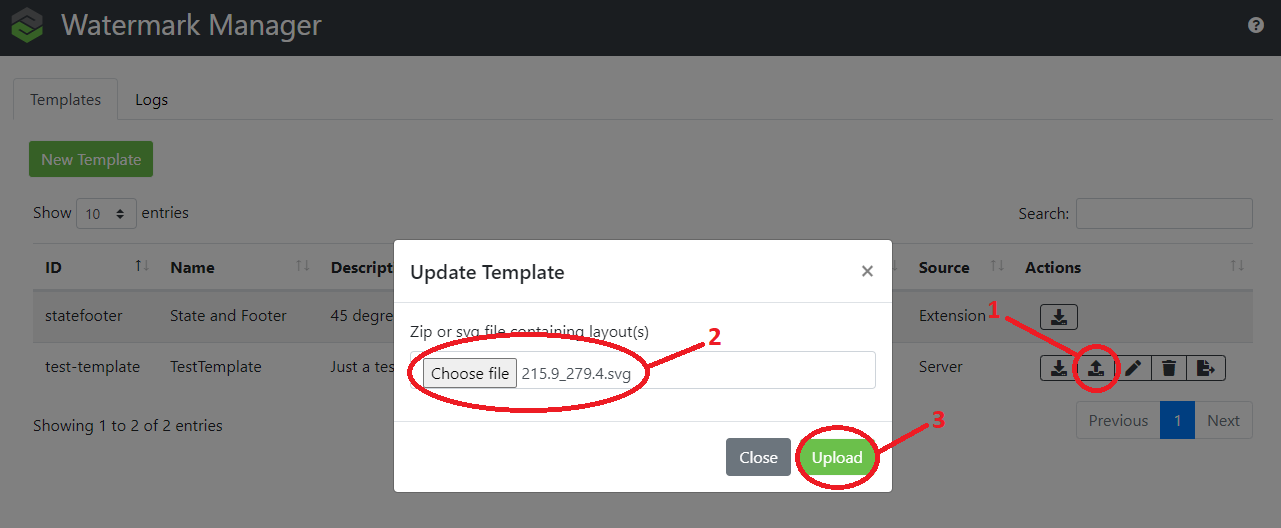
4. Upload the modified .svg file to this new template.
(1) Click on the upload button. (2) Drag and drop the .svg you modified or a .zip with multiple .svg files if you modified more than one. (For this demo I only upload the A4 .svg I modified in previous steps).
DISCLAIMER: By default, the test-template we created contains a template for A4 format named (210_297.svg). The Watermark engine always tries to find the template thats fits the actual PDF papersize best. A4 sizes is 210mm x 297mm. This means, for a A4 papersize, 210_297.svg will be selected over the one we are currently working on 215.6_279.4. Change the svg filename from 215.6_279.4.svg to 210_297.svg so that it overrides the default A4 template with the one we are creating.
After this, you should be able to use the template when watermarking. The new created template will be available in the via the Watermark action UI and can also be used in all the other API the Watermark Adv Extension provides (Wf Robots…)
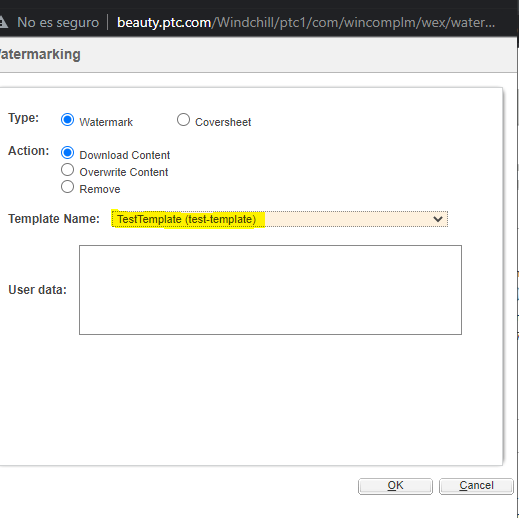
Final result: